If you want to create a product and add some in-depth features/options so that your customers can choose those features/options in the designer window and customize those features independently, you can do that easily from Inkybay. For instance, if you want to create a shoe, where you want your customers to be allowed to choose different colors for different parts of the shoe and add graphics or text on a particular side, you can do that from product settings in Inkybay.
So, let’s show you how to create a configurable product.
Here is a helpful video with all the steps so that you can easily create your configurable product and offer it to your customers.
Step 1: Create Your Custom Product
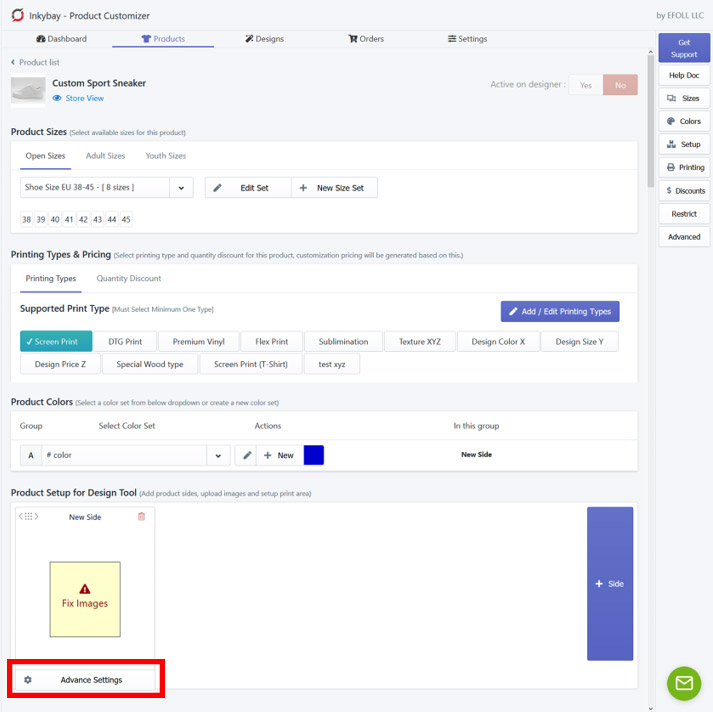
First, you need to create your custom product with basic info/settings (like select size, Printing types & Pricing) as showing on the previous “Adding a customized product” section. Here, we will use another product’s example for better clarification. We will use a sneaker shoe as a configurable product. Here is the admin view of the configurable product setup.
Step 2: Advanced Settings
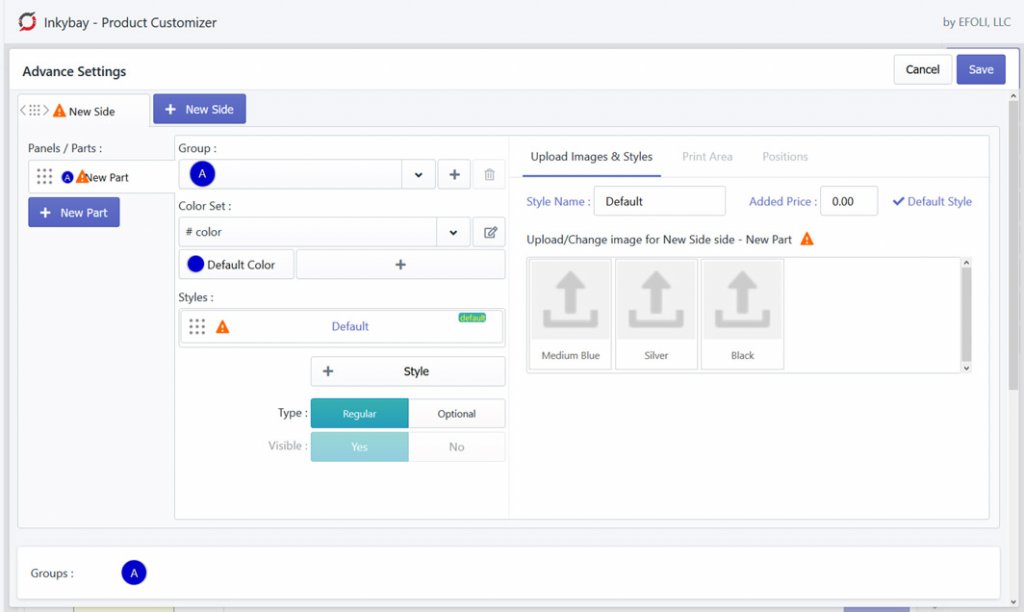
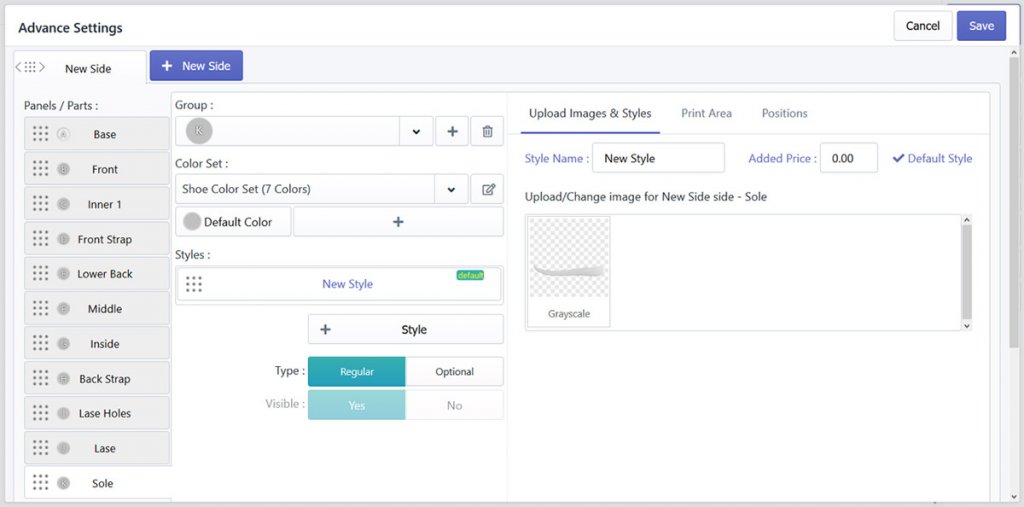
Now, go to the Advanced Settings of product setup. This window will appear
Step 3: Managing Product Parts/Panels
Now, you need to create different Parts (layers), on which your customers will be allowed to customize. Also, if you want you can restrict customization on any part that you will be creating. For creating the first layer, follow these:
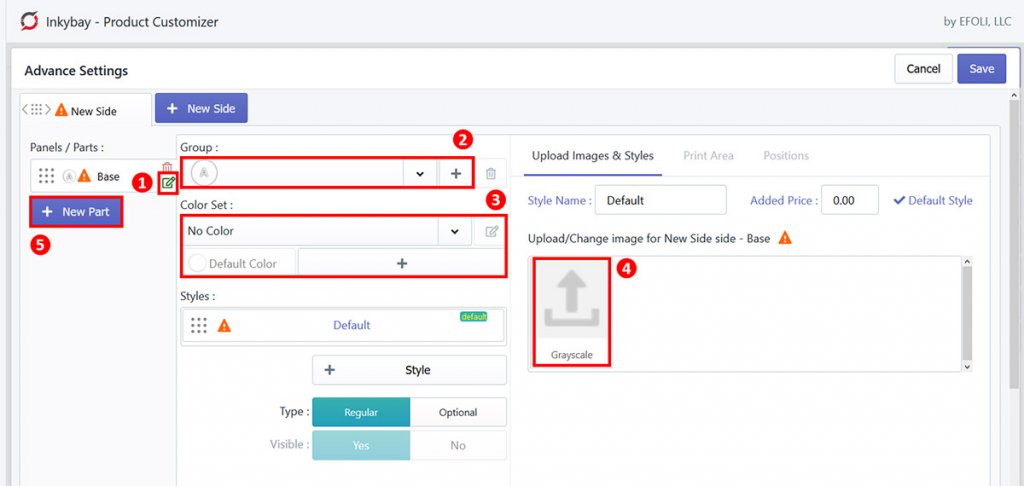
- Rename: Rename the layer by clicking on the green pen/edit icon (Here, we have used an example, in which we are going to create a layer where we do not want to allow any customization. We renamed it as Base). You can put any name you want.
- Group: Select a Group for the base layer. By default, it is set to Group A. To create a new group, click on the + (plus button). Note that, if you select the same group for different parts (layers), then those parts will be interconnected, means when the customer do any customization on a part- like change color, it will also change the color of the connected part.
- Color Set: Now you need to select a color set for this layer. If you don’t want your customers to customize on any particular layer, click on the dropdown and select No Color from the list. It will disable color selection for this layer and would not show color options for this layer. And if you want to allow color selection, click on the dropdown and select your preferred Color Set from the list. You can also create a color set from here if the list does not contain your preferred color. For this, click on the + (plus button) to create one and it will automatically be applied to the current part.Click on Default color to choose one for showing it by default
- Prepare and Upload Images: Now, get back to uploading, click on Upload Icon of the Grayscale and upload the base layer PNG image. Before uploading, you need to create the part/layer image with different layers for individual upload as transparent PNG, so that the alignments do not get clattered. It is better to create layers on a single file (PSD). Here is a demo of the layered image of the sneaker shoe.
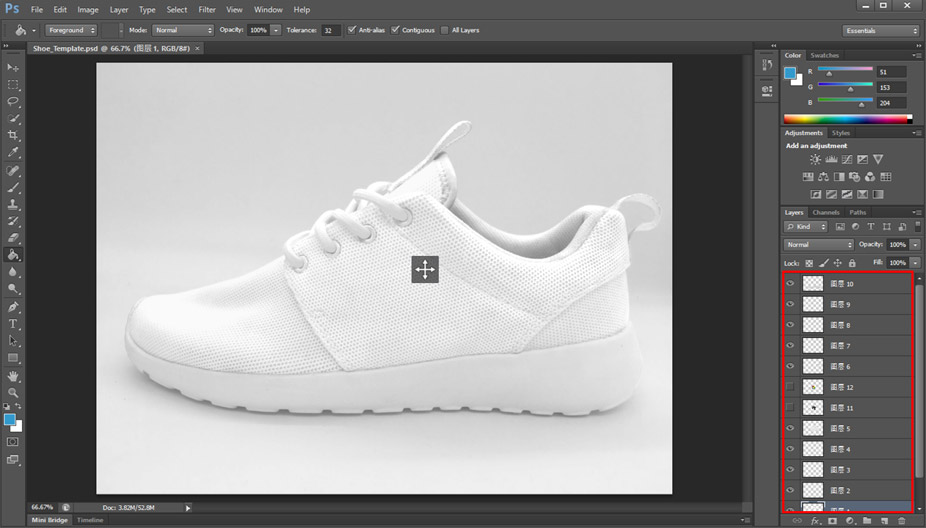
Here you can see that different layers have been created as separated cutting parts. Now click on the eye of each layer except the one that you want to export, select the base layer and save the layer as PNG. Do the same for each layer. - + New Part: Now you need to create other parts (layers). Click on the + New Part and follow the above processes to set all the parts. Make sure you set groups for each part. You can use the same group for different parts if you want to connect them or set different groups for each part. After creating all the parts (layers), it will look like this:
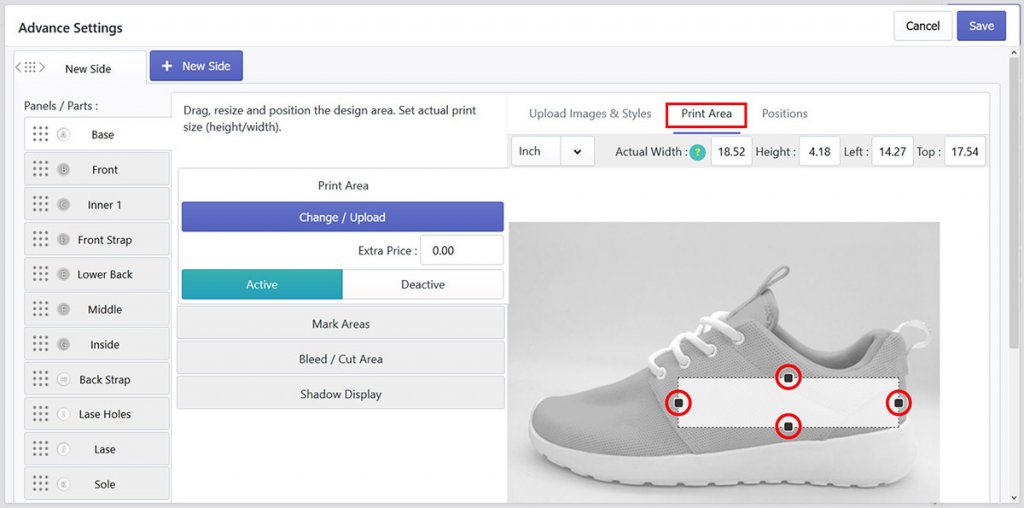
Step 4: Setup Print Area
Now, you need to set the printing area. The print area is where you want to allow your customers to add additional designs (e.g. text, graphics, etc.). To set the print area, click on the Print Area tab, adjust your main design area by selecting and dragging the mark area dots to your preferred area. It will look like this:
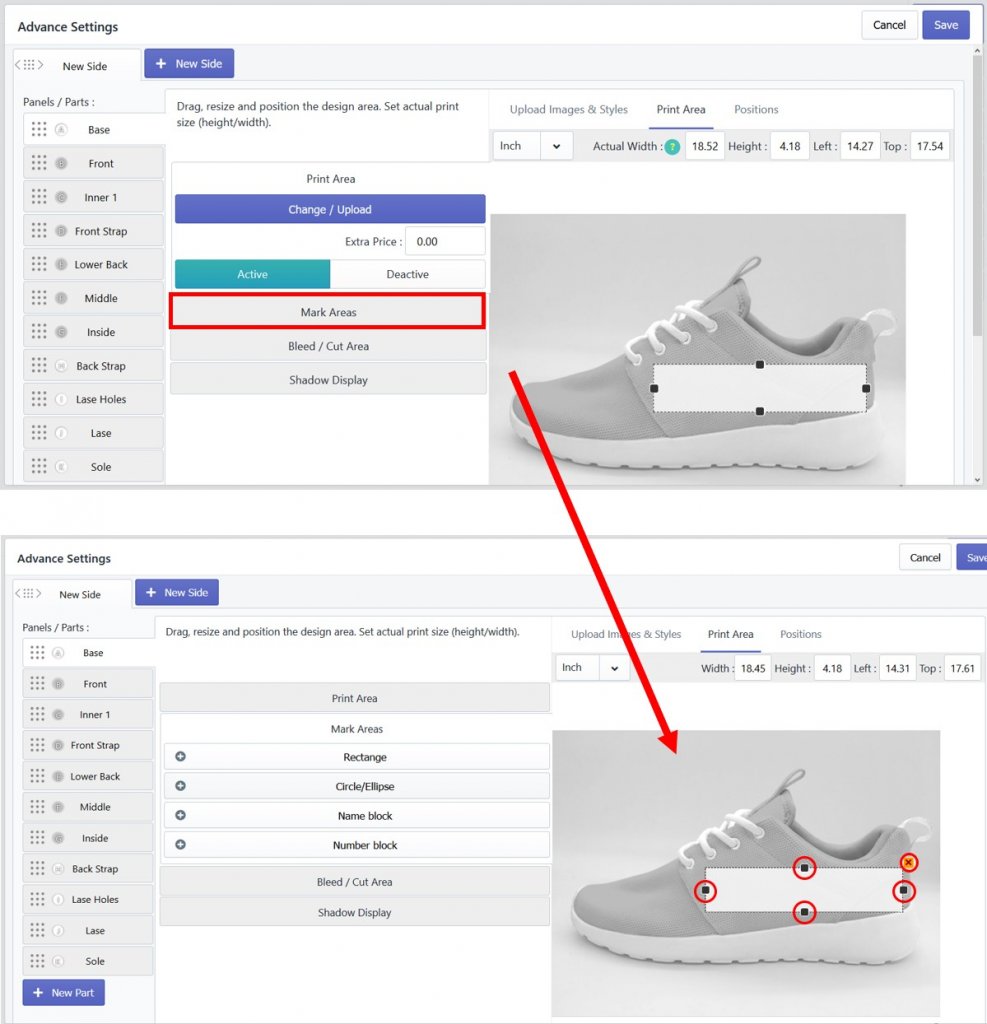
If you want to show a dotted mark in the design tool, click on Mark Areas, then select and drag the mark area dots to mark. See the demo image below:
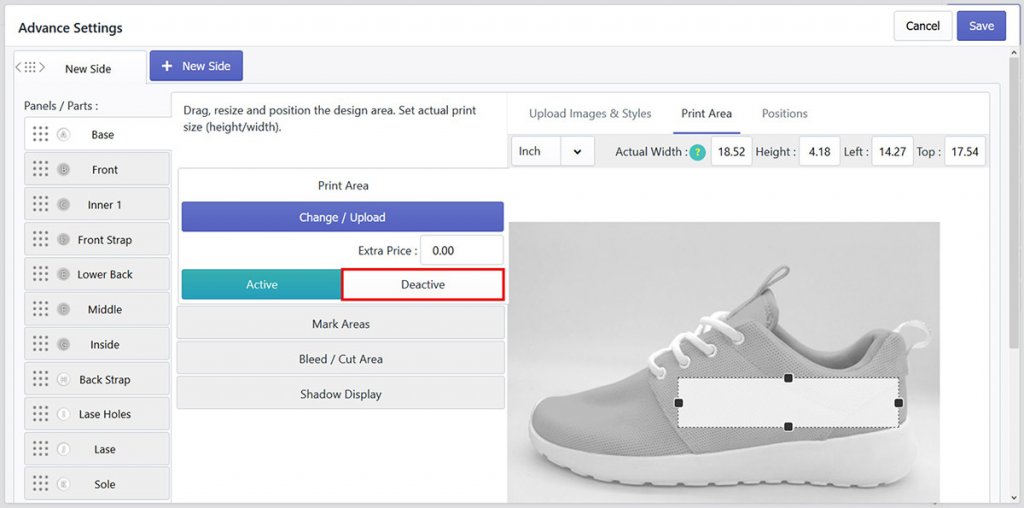
If you do not want to allow adding any extra design (e.g. text, graphics, etc.) except the product configuration, you can deactivate the design area by clicking on Deactivate. See the demo image below:
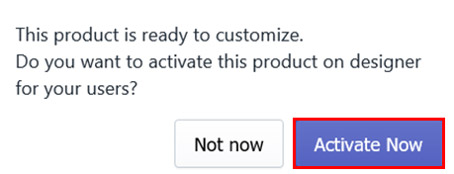
Step 5: Publish Your Configurable Product
Now, Click on Save to save the product settings, and activate the product from Product Activation Prompt by clicking Active Now
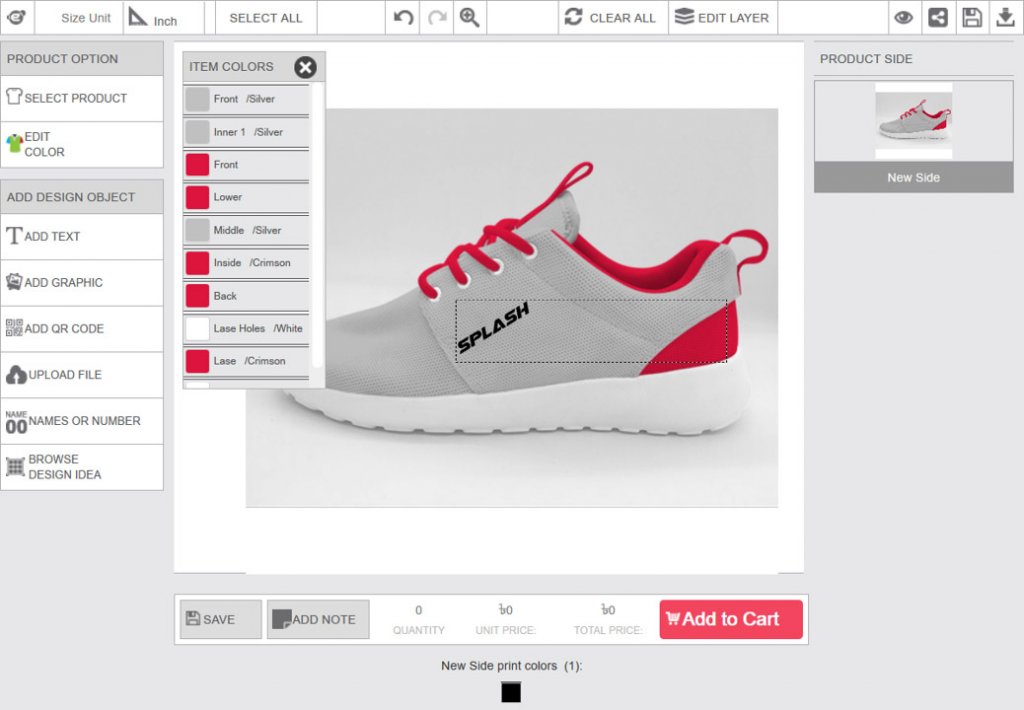
Your configurable product is now ready. This is how it may look in the designer window with the layers:
Here is a helpful video with all the steps so that you can easily create your configurable product and offer it to your customers.
Still, if you face any further issues or need help, feel free to contact us. Our support team will be happy to help you.
You can always reach us via
- Support ticket from Inkybay app
- Live Chat in Inkybay app
- Direct email to support@productsdesigner.com
So, Good Luck! And happy selling with Inkybay.