If you need to upload new clipart or want to change some settings of existing clipart. Then, Clipart Management is the place. Here you can upload clipart, change clipart title, and its category. Not only that, but you can also add additional prices for the cliparts, change their indexing/order, or delete them altogether.
Let’s get started.
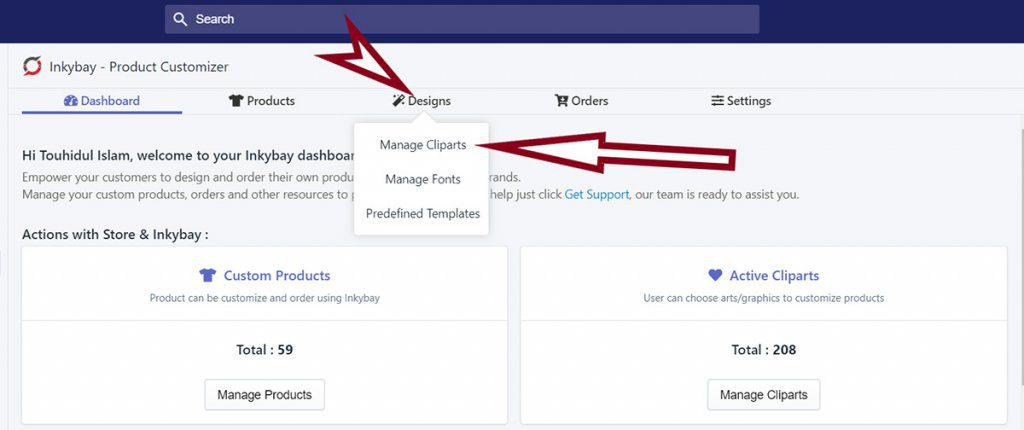
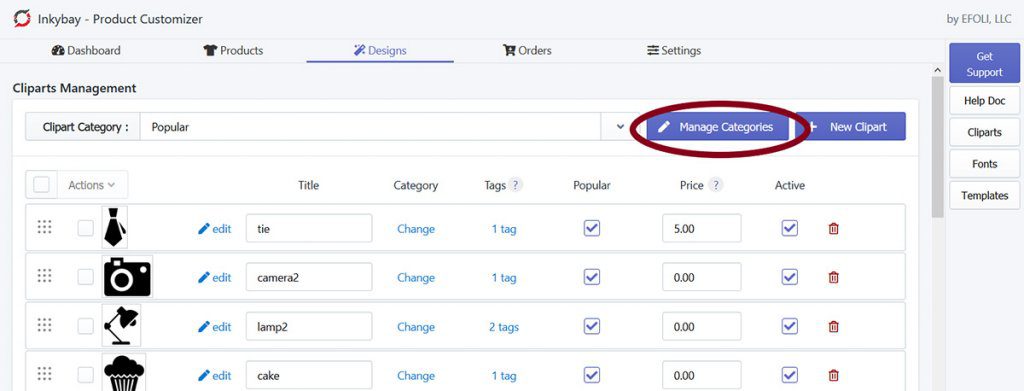
From your Inkybay dashboard, go to Design>>Manage Clipart. It will take you to the ‘Clipart Management’ page.
Manage Existing Cliparts/Graphics
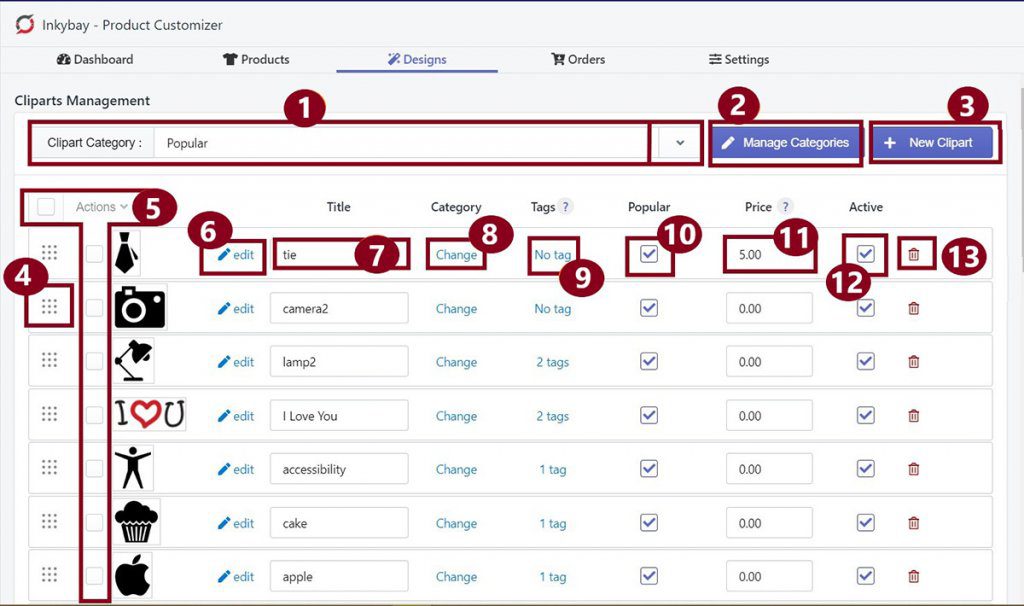
Details with numbers shown on the image:
- Use the Clipart Category box to see all the available cliparts in a Category.
- Manage Categories will let you add a category/subcategory, or you can edit existing categories/subcategories.
- It will allow you to add a new Clipart
- You can change the Clipart Order. Hover your mouse on the nine dots, then hold and drag it to change the clipart order. The clipart order on the designer page will be the same as it is here.
- It helps to take bulk actions. Select multiple cliparts, choose an option from the Action drop-down menu.
- The Edit option will help you to change the clipart.
- You can change the Title here.
- The category Change option allows you to change the category/ or subcategory assigned for that clipart.
- You can add or remove Tags from clipart. Tags help your customers to find clipart easily. Tags work like keywords for the search option.
- Check the Popular checkbox defines that the clipart will be added in the popular clipart category. It would not change the original category of that clipart, rather it will work as an additional category for that clipart.
- If needed, you can add additional Price here. This additional price will be added if your customers use that clipart on a product.
- Activate/ Deactivate a clipart. Only activated cliparts will be shown on the Designer Page.
- Delete clipart.
Adding a New Clipart/Graphics
Inkybay has a bunch of preloaded clipart that is available to use by your customers. You can also upload your own vector (SVG) or raster (JPG, PNG) clipart in your store.
You can upload clipart in raster and vector format. Rastar supported types are JPG, PNG. And you can upload the SVG file for Vector format.
When you upload Vector files as a clipart/graphics, your customers will have access to change the color of the clipart/graphics. On the other hand, Raster file colors can’t be changed.
To add new clipart, follow the steps:
- Go to your Inkybay Dashboard and hover your mouse on Design. A drop-down menu will appear.
- Select Manage clipart.
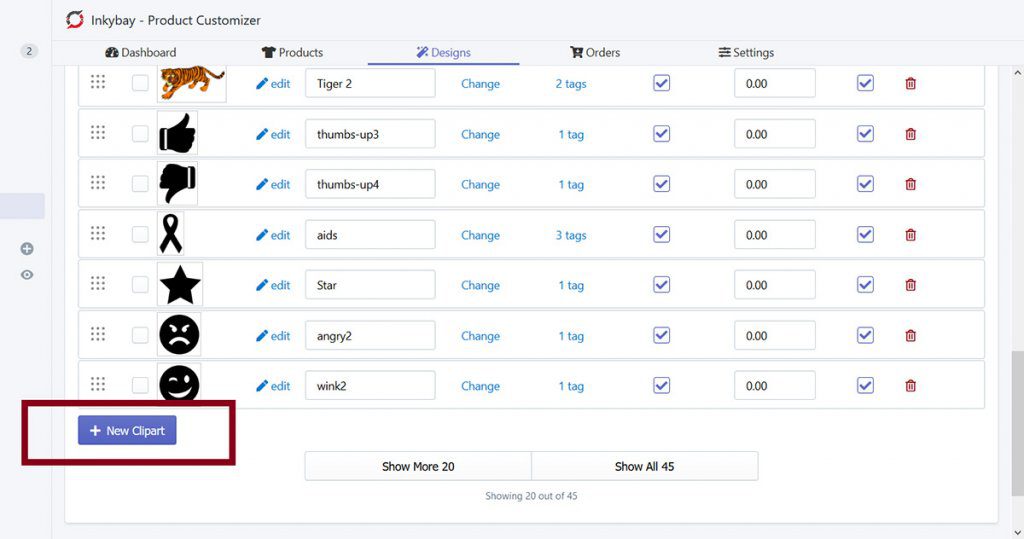
From the following page, you will find the ‘New Clipart’ button. Click on it.
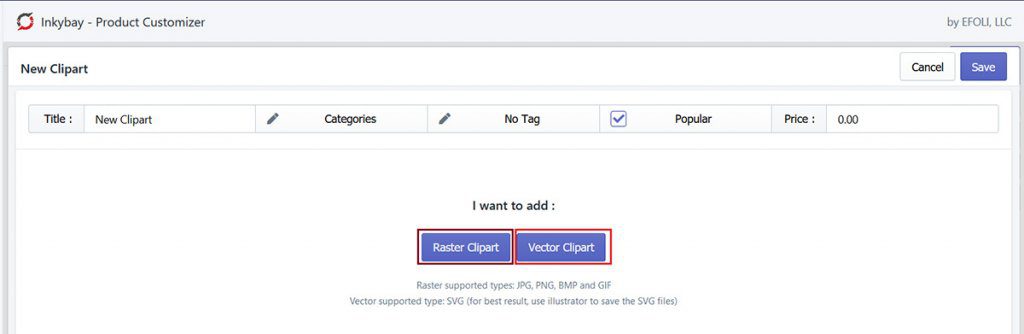
Now select your Clipart type:
- Vector Clipart
- Raster Clipart
Adding Vector Clipart
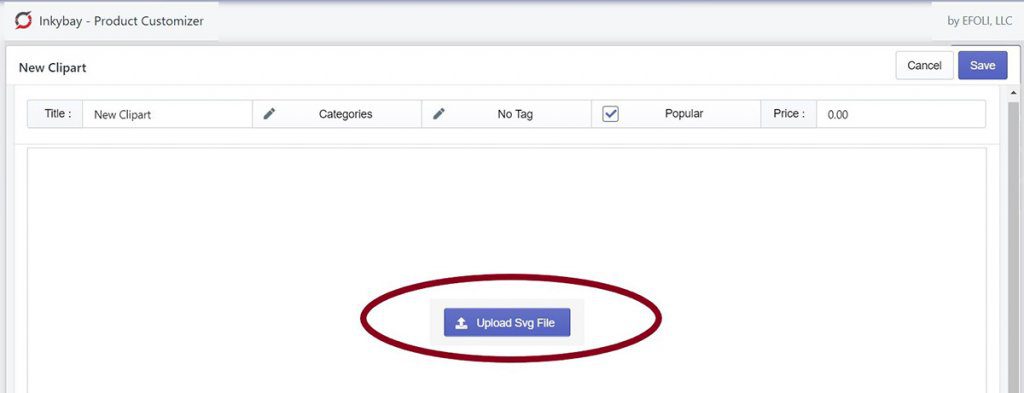
If your clipart is in SVG format than select Vector clipart. The next page will allow you to upload the SVG.
Click on the ‘Upload SVG file’. A pop-up window will appear, now find the clipart from your device.
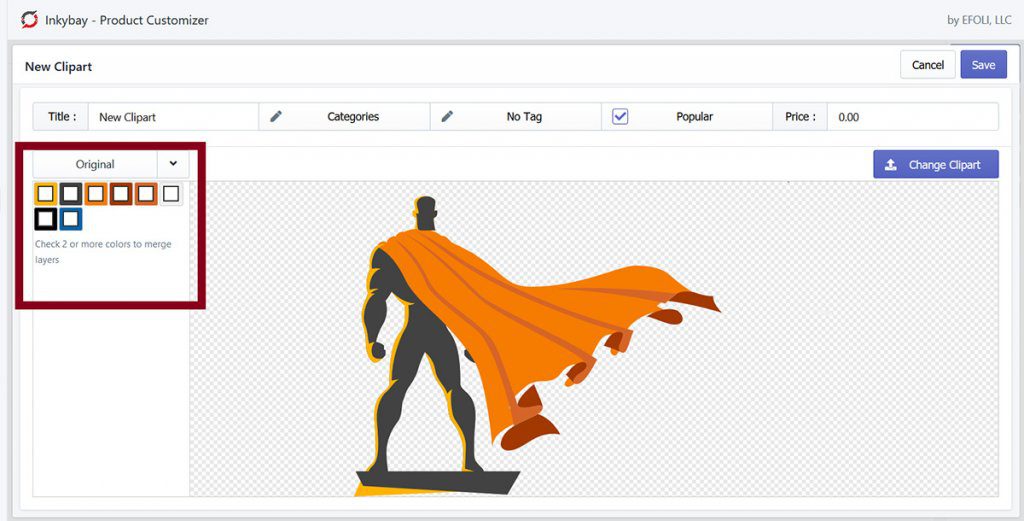
The following page will show you all the colors you are using in that clipart. If you are okay with the number of colors then save it, or you can marge colors to limit the number of colors for the clipart.
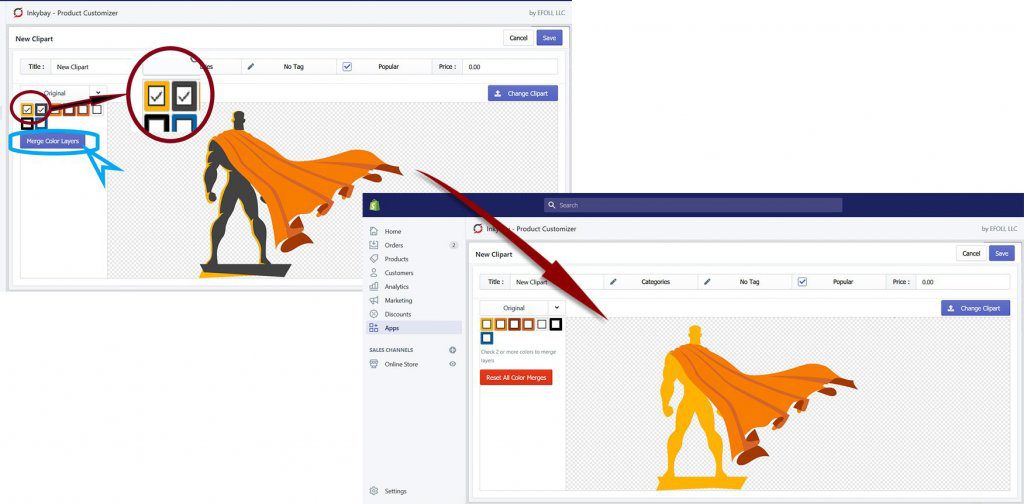
To merge colors, follow the steps:
Select more than two colors to merge and click on ’Merge Color Layer’
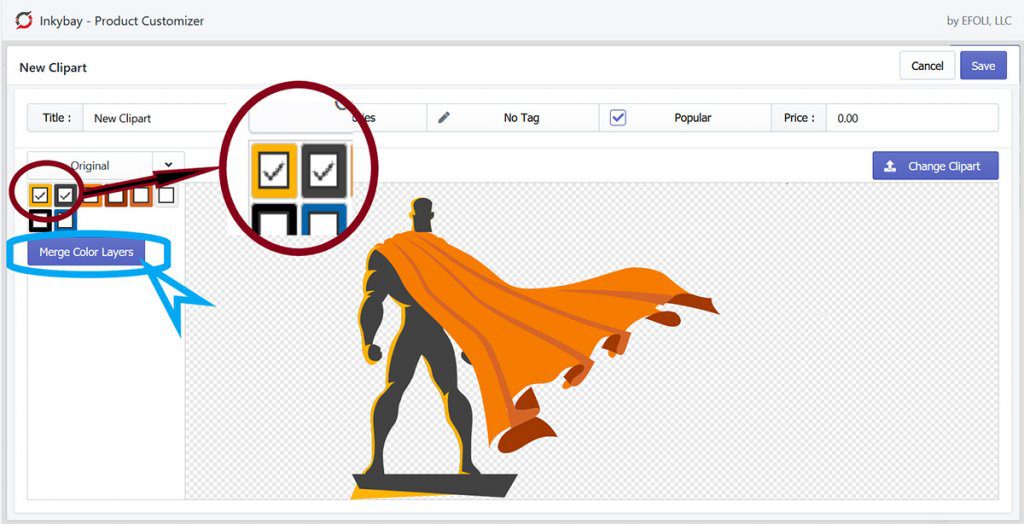 The color you select first will be the dominant color.
For example, If you select Yellow first then black (Image below) then yellow will replace the black color.
When you are done with the color setup. You need to finish up the setting by adding a Title name for the clipart, set a category/sub-category, Tag name, and add additional price(if any).
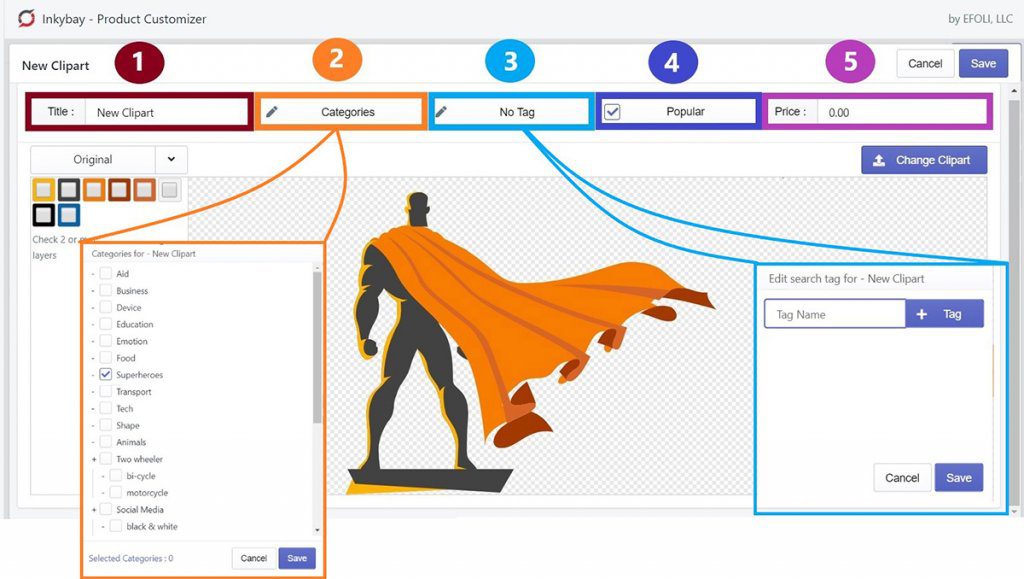
- Enter a Title in the text field for the clipart you added.
- After that Select a Category/Sub-category where you want add the clipart. Click on the category. A category list will appear, then choose one.
- Now click on ‘No Tag’ to add a tag. The tag will work as a keyword. If your customers search clipart using the keyword, the clipart with that keyword will be displayed to the customer.
- Click on the Popular check-mark if you want to add the clipart in the popular list too.
- And finally, you can add an additional Price for the clipart. Enter the price in the text field that you want to add for the clipart.
Select the Save button to finish adding the new clipart.
Adding Raster Clipart
Select Raster clipart when your image is in JPG or PNG format. Click on ‘Change/Upload clipart’, Choose your file from your device and select OK.
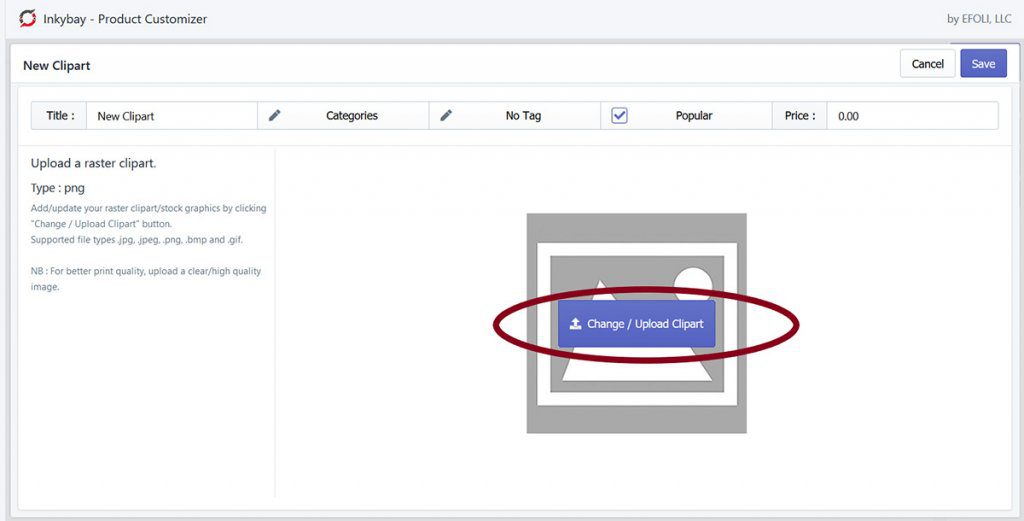
When the uploading process is complete, Enter a Title for the clipart, Select category, add Tag, add it to Popular category, and add additional Price (if any), as shown in the earlier step.
Select the Save button to finish adding the new clipart.
Your New Clipart is ready and active for your customers on the design window!!
Managing Clipart Category & Sub-category
Categories & Subcategories help to organize the clipart. You can set clipart under a category or a sub-category so that your customers can find the types of clipart they are looking for easily.
For example, you have a heart-shaped clipart and you added that in a category named ‘Romantic’ Your customer will find that heart shape clipart easily when they need it to print it on their valentine gifts.
To manage existing categories or create a new category follow the steps:
From the Design menu, go to Manage Clipart and select Manage Categories.
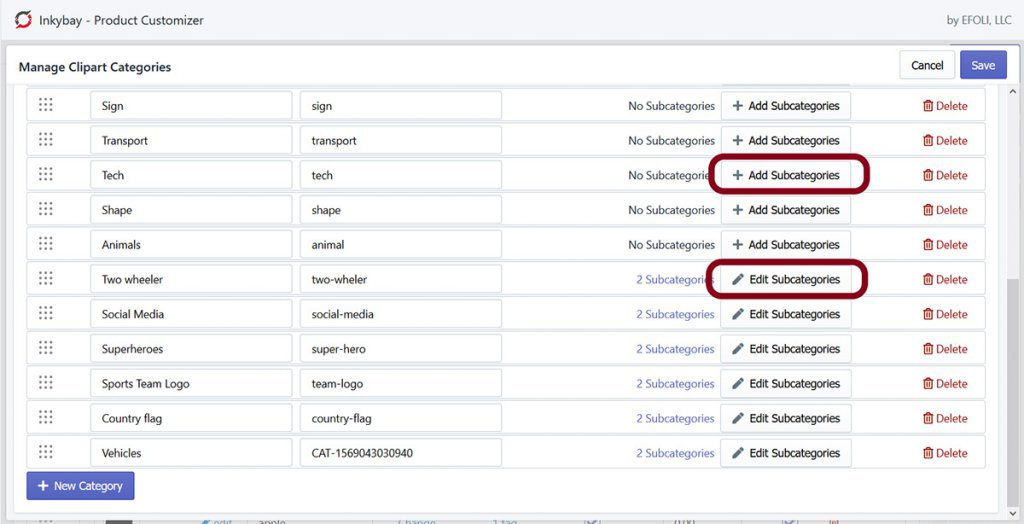
From the following window, you will see all existing categories, where you can add new categories, edit or remove existing categories as you wish.
- To add a new category Select ‘+ New Category’ and give a Name and Slug Name.
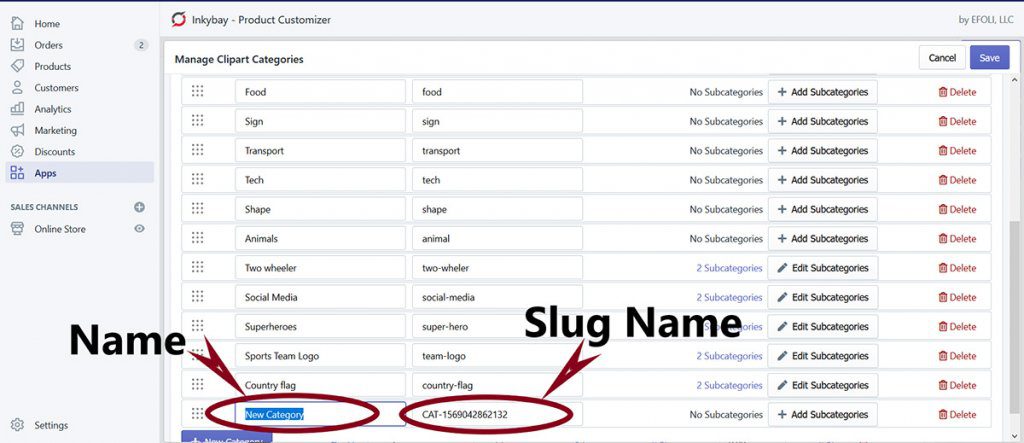
Now click on Save.
To create a Sub-Category follow the steps:
- Select ‘Add sub-Category’ if the category has no sub-category, Or select ‘Edit Category’ if you want to add more sub-categories in a Category.
Next, enter Sub-category name in the Title box. You can set a slug name too. Follow the same steps for adding a category.
Now click on the Save button.
Still, if you need help, feel free to contact us. Our support team will be happy to help you.
You can always reach us via
- Support ticket from Inkybay app
- Live Chat in Inkybay app
- Direct email to support@productsdesigner.com
So, Good Luck! And happy selling with Inkybay.