If you have products that require a custom shape print area like circular, rectangular, star, polygonal, or any other custom shape as print area, you can setup that custom shape print area by following the given steps:
Here is the help video for set up your custom print area.
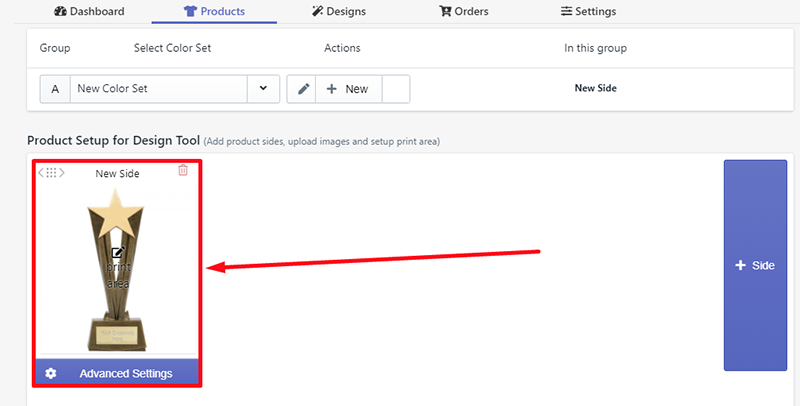
- Edit the custom product and go to your product “Product Setup for Design Tool” section and click on “Advance Settings”
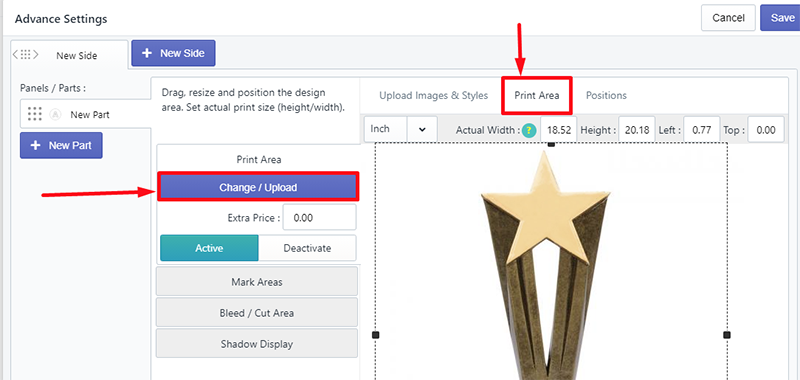
- Now, select “Print Area” and click on “Change/Upload button” to upload your custom print area shape
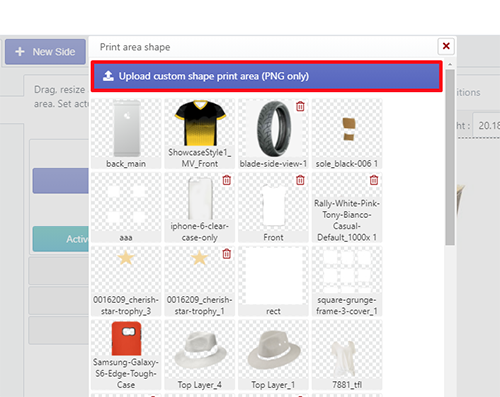
- Upload your custom shape print area as a transparent PNG image (keep the transparency for the part which you do not want to show) that you have created by any photo editor (Photoshop Recommended)
- Now, adjust your uploaded custom shape print area over your product back image
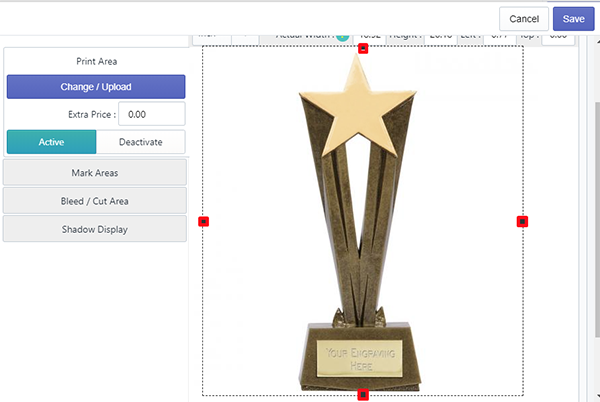
- Save it
Now, if you go to the designer page and add any graphics/text that will be inside the custom shape print area.