Inkybay comes with 150+ pre-installed Fonts. You can also upload your own Fonts in the app. If you need to upload a new font or want to change some settings of existing fonts. Then, Fonts Management is the place. Here you can upload a font, change fonts title and its categories, change their indexing/order, or delete fonts.
Let’s get started.
Manage Existing Fonts
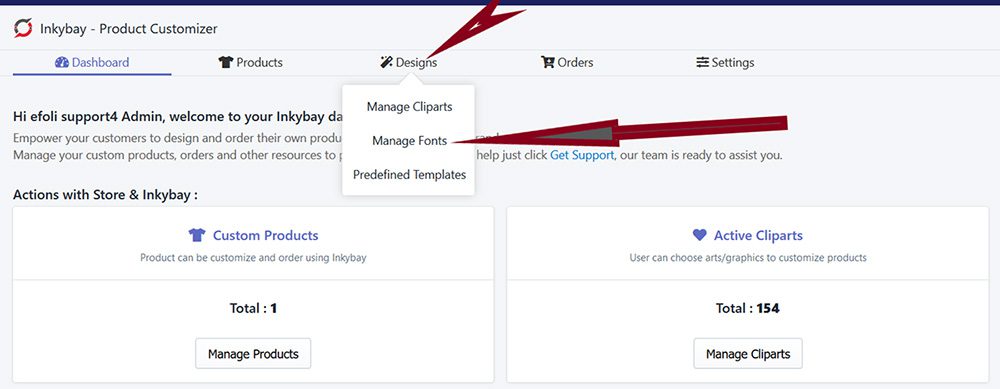
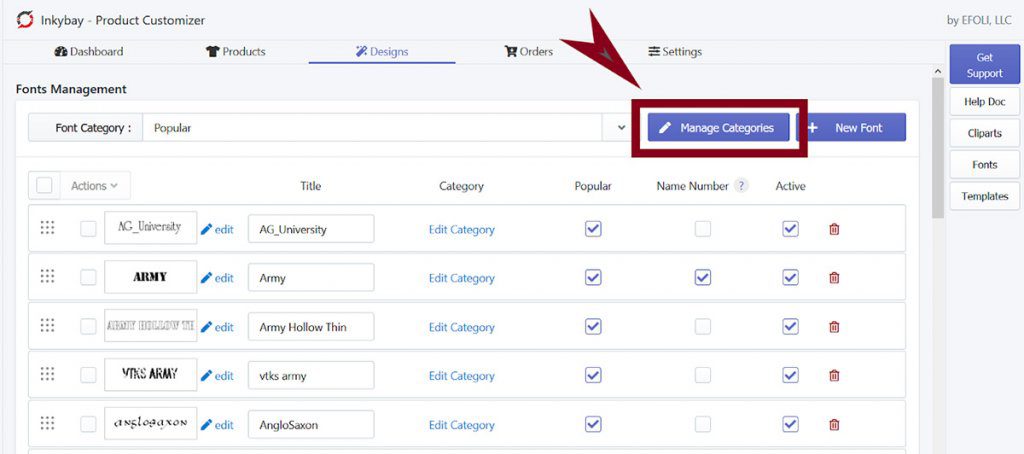
From your Inkybay dashboard, go to Design>>Manage Fonts. It will take you to the Font Management page.
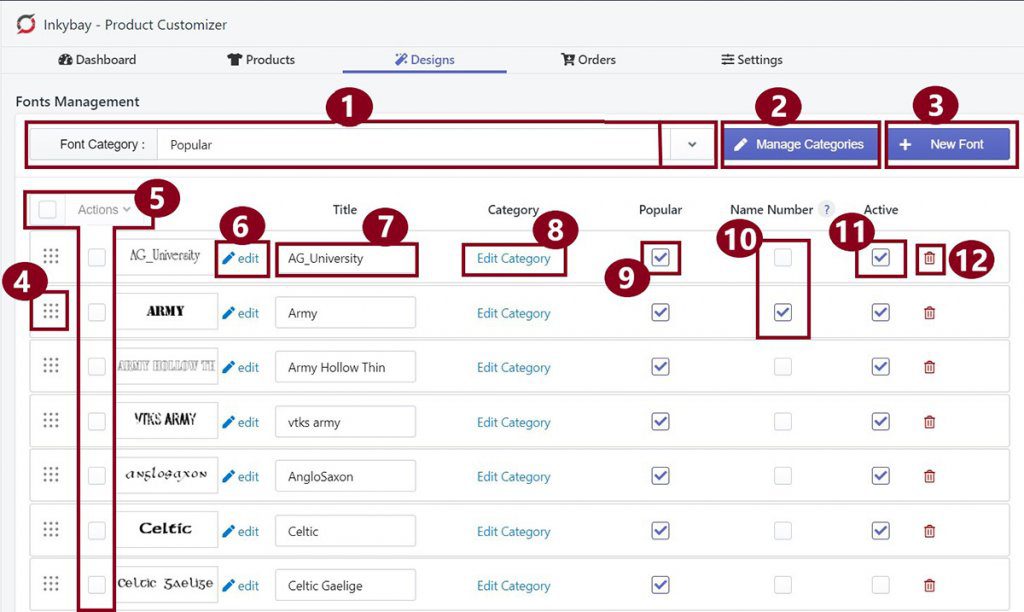
Details with numbers shown on the image:
- Use the Font Category box to see all the available fonts in a Category.
- Manage Categories will let you add a category/subcategory, or you can edit existing categories/subcategories.
- It will allow you to add a new font
- You can change the Font Order. Hover your mouse on the nine dots, then hold and drag it to change the clipart order. The font order on the designer page will be the same as it is here.
- It helps to take bulk action. Select multiple fonts, then choose an option from the Action drop-down menu.
- The Edit option will help you to change the clipart.
- You can change the Title here.
- The Edit Category option allows you to change the category or subcategory assigned for that font.
- Check Mark on the Popular checkbox defines that the font will be added in the popular font category. It would not change the original category of that font, rather it will work as an additional category.
- You can choose fonts that will be allowed to use by your customers in the Name & Number option on the designer page.
- Activate/ Deactivate a font. Only activated fonts will be shown on the Designer Page.
- Delete a font.
Adding your custom Fonts
You can also upload your own Fonts in the app. You must need to upload the Fonts in web Fonts (.woff) format. If you don’t have your Font in .woff format, don’t worry. There are lots of free apps/ websites, for example: ‘WebFont Generator’, on the internet to convert any Fonts type to .woff format.
Have you converted your Fonts in .woff format? YES!!!
Then let’s get started.
To add a new Font, follow the steps:
- To add new Fonts, go to your Inkybay Dashboard and hover your mouse on Design. A drop-down menu will appear
- Select Manage Fonts.
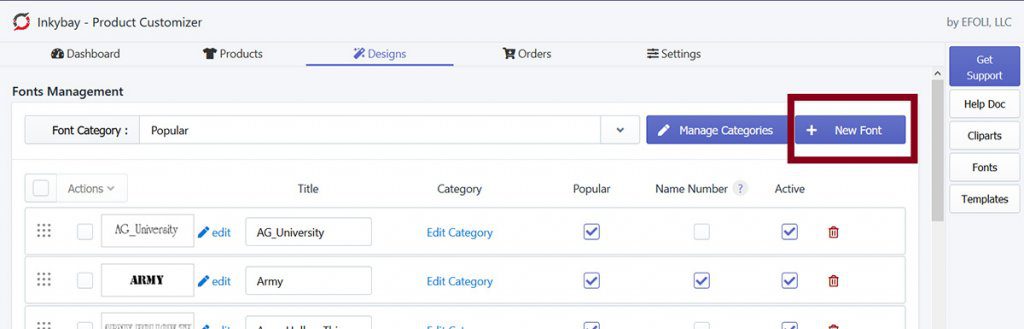
- From the following page, you will find the ‘New Fonts’ button. Click on it.
If you already have web Fonts (.woff), click on Change/ Upload Font.
But If you don’t have the .woff Font yet, you can use any online Font conversion tool to generate your .woff Fonts. For example “WebFont Generator”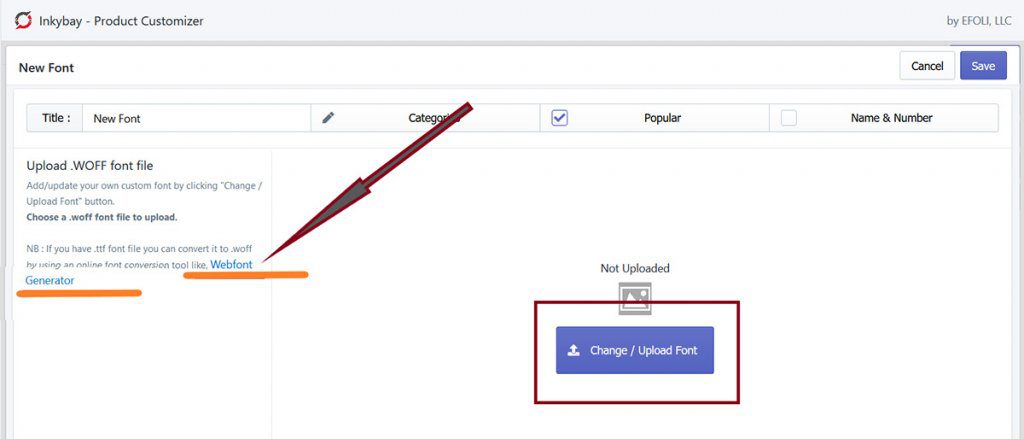
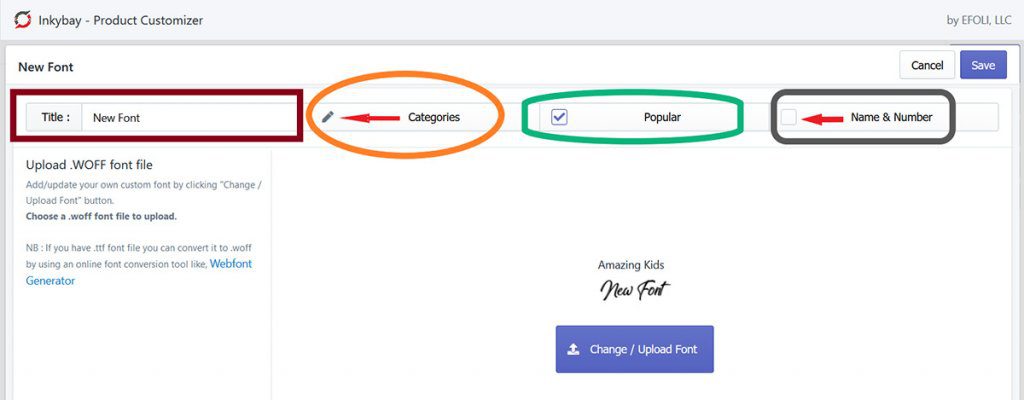
Almost complete! Now, enter a title name, set a category for the Font. Then Mark the Popular box if you want to put it on the popular list. Finally, check/ uncheck the name & number box if you need this Font to be available for Name & Numbers and select the Save button.
The New Font is ready and active!!
Managing Fonts Category & Sub-category
Categories & Subcategories help to organize the Fonts. You can set a font under a category or a sub-category so that your customers can find the types of fonts they are looking for easily.
To create a category follow the steps:
- From the Design menu, go to Manage Fonts and select Manage Categories.
On the next page, select ‘+ New Category’ and give a Title
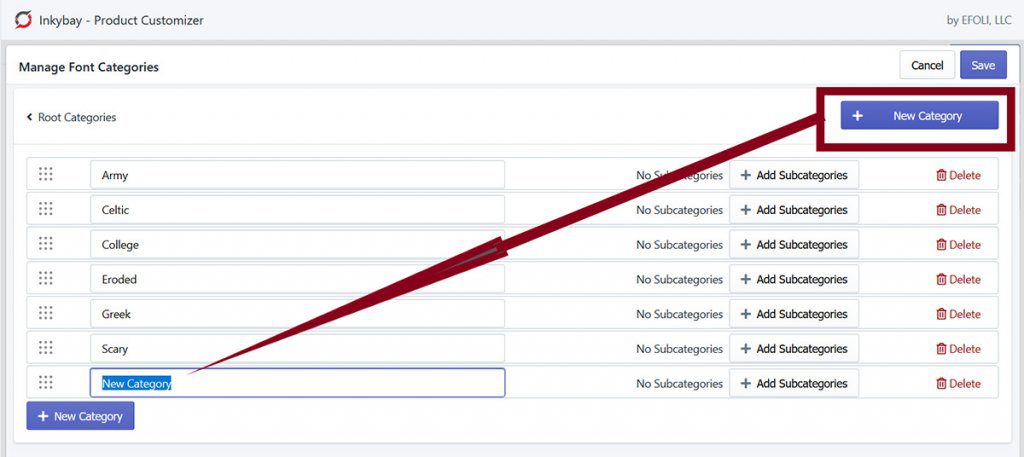
Now click on Save.
To create a Sub-Category follow the steps:
- From the Design menu, go to Manage Fonts and select Manage Categories.
- Now select ‘Add sub-Category’ if the category has no sub-category, Or select ‘Edit Category’ if you want to add more sub-categories in a Category.
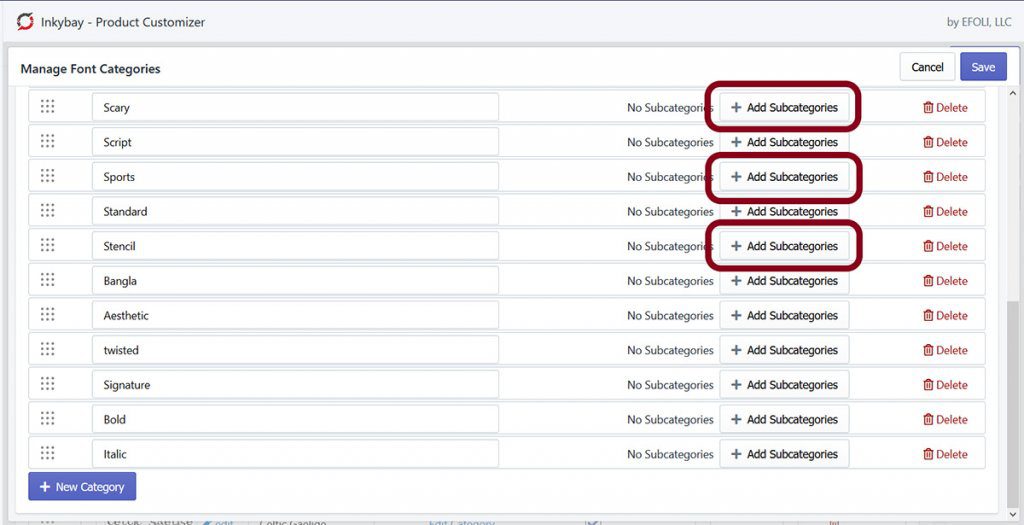
Next, enter Sub-category name in the Title box and other details as a category shown in the earlier step. Finally, Save it.
Still, if you need help, feel free to contact us. Our support team will be happy to help you.
You can always reach us via
- Support ticket from Inkybay app
- Live Chat in Inkybay app
- Direct email to support@productsdesigner.com
So, Good Luck! And happy selling with Inkybay.